WooCommerce QuickBooks Gateway

30 Days
Money Back

Highly Secure &
Stable Products

Free 9 Months
Upgrade

Free 90 Days
Support
Price $39.00
Price $39.00

WooCommerce QuickBooks Gateway
Price $39.00
Price $39.00

Screenshots
- Details
- Reviews
- Features Request
Accept credit card payments on your WooCommerce shop with QuickBooks Payment.
Configuration
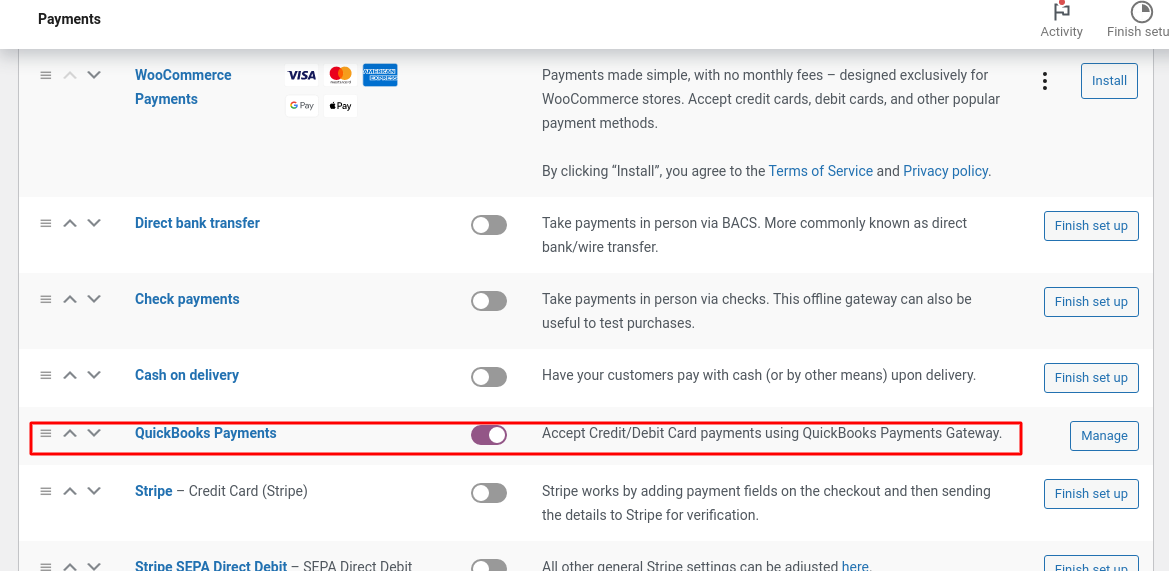
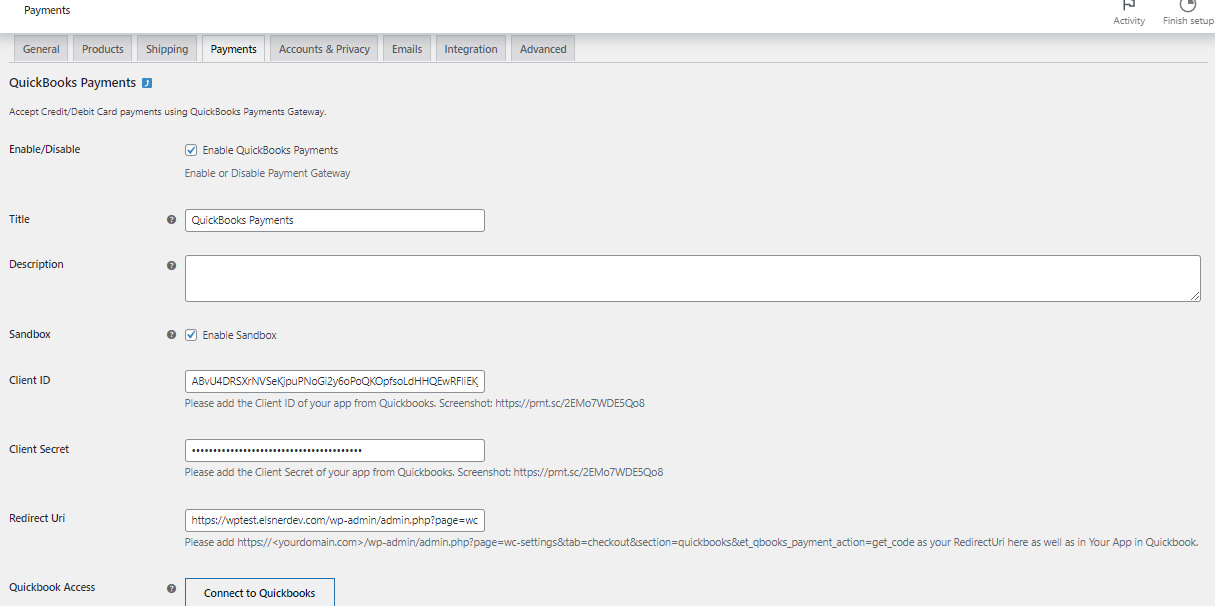
1) Navigate to 'WooCommerce > Settings > Payments' on the menu.
2) Manage QuickBooks Payment Gateway from the Payment Gateways option.
3) Enable/Disable’ to enable the gateway.
4) Read the next section to learn how to setup and configure the plugin.
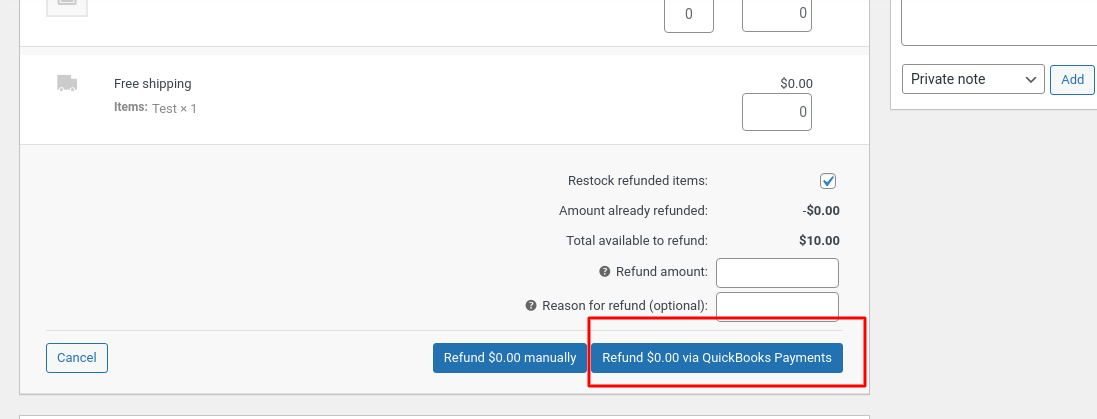
5) QuickBooks Refund to enable the Refund.
Test sandbox
1) Create Your Sandbox Account.
2) After Creating sandbox account login in that with your email and password.
3) Create App in QuickBooks Platform . Get the Client Id and Client Secret. After that add the Redirect URI . You will be assigned with a SandBox Company by Default on creation of App.
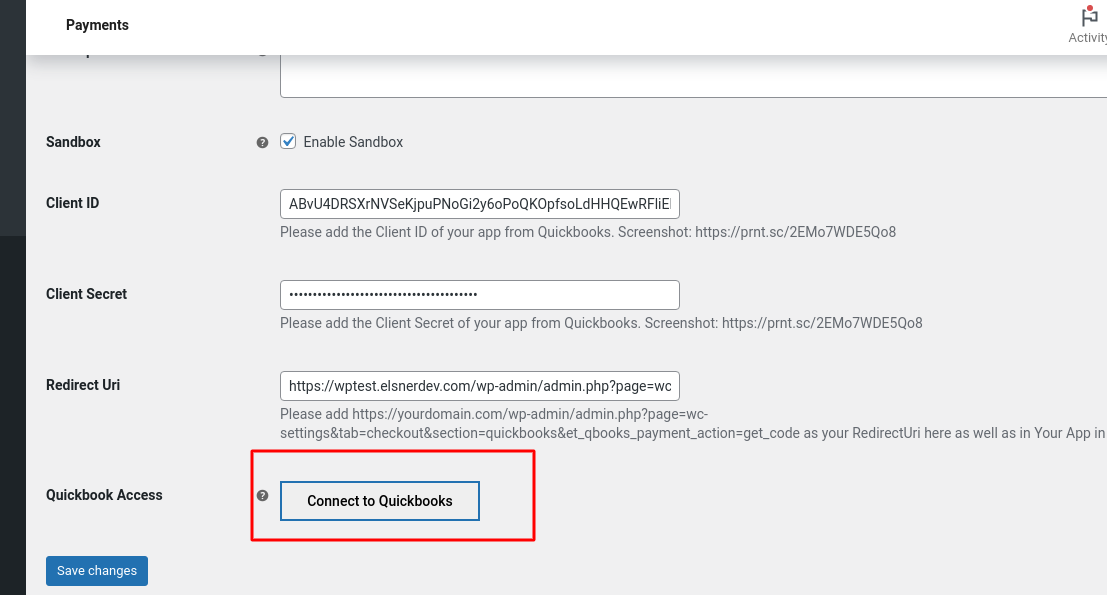
4) Get the Client Id and Client Secret - Add these details to WooCommerce > Settings > Payments > QuickBooks Payments.
5) Add the Redirect Uri as mentioned in WooCommerce > Settings > Payments > QuickBooks Payments same as per in App.
6) After filling these details Click on "Connect to QuickBooks" button under WooCommerce > Settings > Payments > QuickBooks Payments to Connect account to QuickBooks.
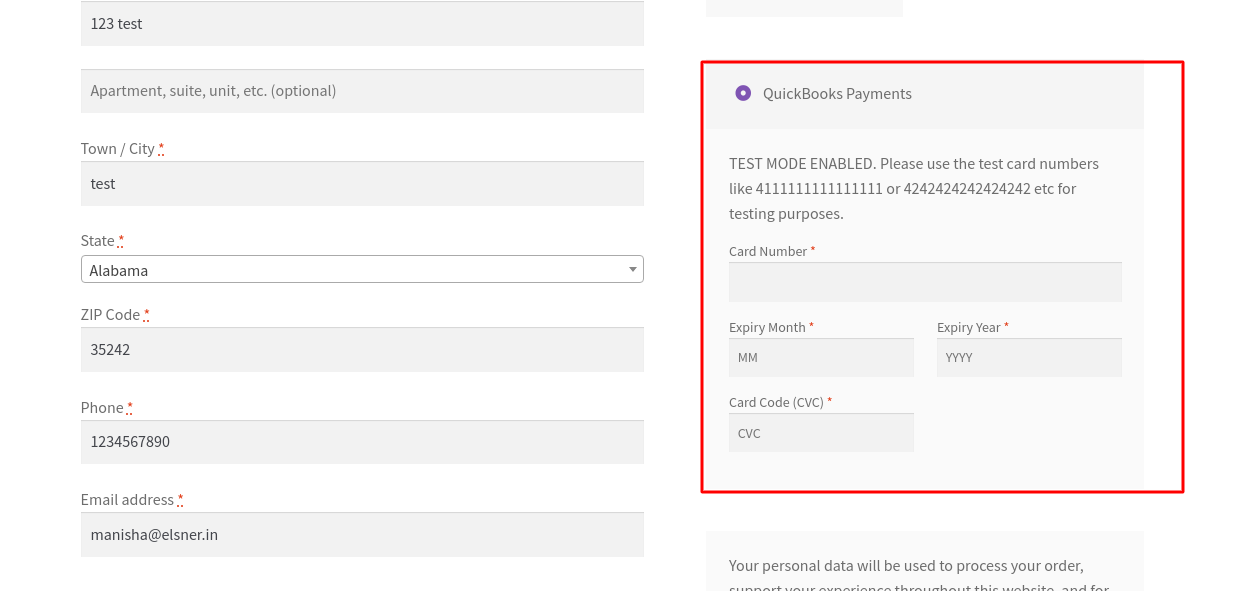
7) Once the Account is connected, test payments on Checkout using Test Credit Card Details.
- Test card details:
- Card Name: John Smith
- Card Number (No spaces): 4242424242424242
- Card Expiry Date: 12/25
- CCV Number: 123
Requirements
- You need to install the WooCommerce plugin.
- You’ll first need to configure your QuickBooks payments plugin properly else the payment process will not work. For Production mode, you also need to publish the App in order to receive the Live Payments.For that please check this link.
What Features your Extension Lacks?
Details
Accept credit card payments on your WooCommerce shop with QuickBooks Payment.
Configuration
1) Navigate to 'WooCommerce > Settings > Payments' on the menu.
2) Manage QuickBooks Payment Gateway from the Payment Gateways option.
3) Enable/Disable’ to enable the gateway.
4) Read the next section to learn how to setup and configure the plugin.
5) QuickBooks Refund to enable the Refund.
Test sandbox
1) Create Your Sandbox Account.
2) After Creating sandbox account login in that with your email and password.
3) Create App in QuickBooks Platform . Get the Client Id and Client Secret. After that add the Redirect URI . You will be assigned with a SandBox Company by Default on creation of App.
4) Get the Client Id and Client Secret - Add these details to WooCommerce > Settings > Payments > QuickBooks Payments.
5) Add the Redirect Uri as mentioned in WooCommerce > Settings > Payments > QuickBooks Payments same as per in App.
6) After filling these details Click on "Connect to QuickBooks" button under WooCommerce > Settings > Payments > QuickBooks Payments to Connect account to QuickBooks.
7) Once the Account is connected, test payments on Checkout using Test Credit Card Details.
- Test card details:
- Card Name: John Smith
- Card Number (No spaces): 4242424242424242
- Card Expiry Date: 12/25
- CCV Number: 123
Requirements
- You need to install the WooCommerce plugin.
- You’ll first need to configure your QuickBooks payments plugin properly else the payment process will not work. For Production mode, you also need to publish the App in order to receive the Live Payments.For that please check this link.

